E-Portfolio
building information modelling
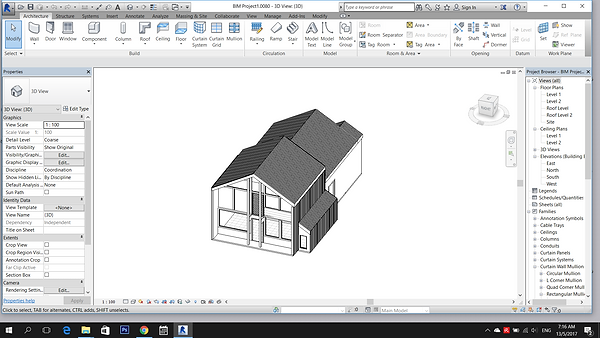
Project 2a Building Modelling - Work In Progress


Add grid lines
Doll's House
Go to Architecture > Walls, to build up walls


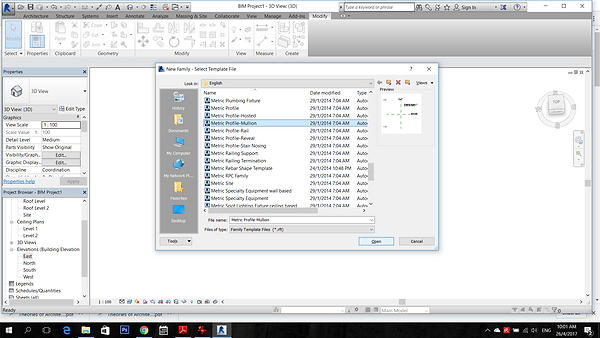


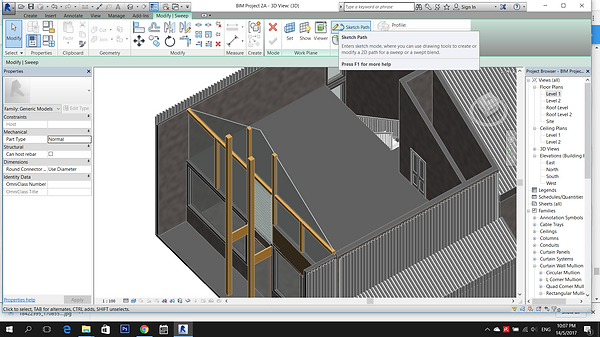
To create a corrugated roof, first you need to create a Family.
Go to New > Family > Metric Profile-Mullion
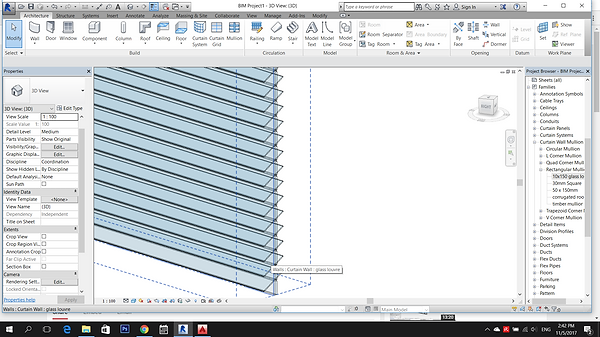
To create louver window, go to Project Browser > Families > Curtain Wall Mullion > right click Rectangular Mullion to create a New Type - Glass Louver
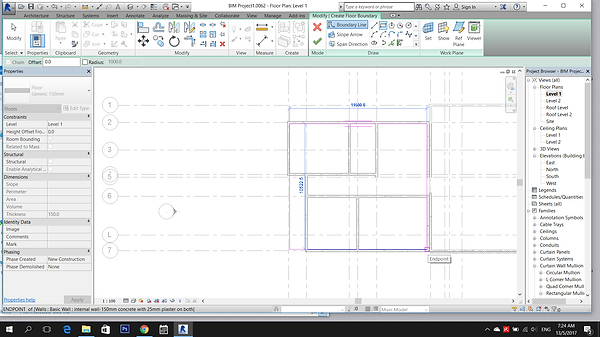
To modify the floor, select the floor and click Edit Boundary.
Use Boundary Line to modify the floor and Trim the unwanted line.
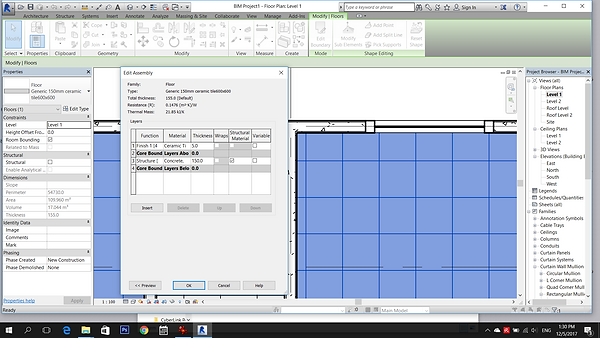
To change the material of the floor, go to Properties > Edit Type > Duplicate > Create a new name > Edit, then choose the structure material and finishes of the floor.
To insert door, go to Architecture > Door.
Now the floor slab is created.
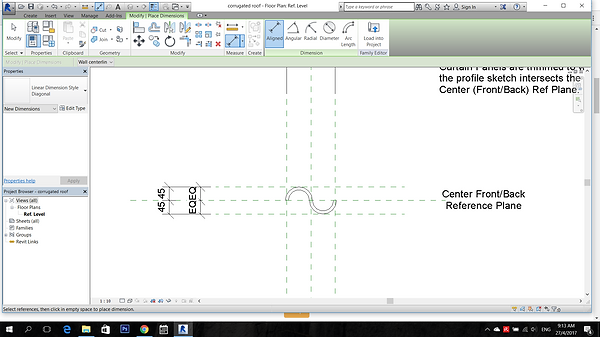
Use command RP to draw the reference plane and use command DI to add the dimension.

Go to Create > Line > Draw > Start-End-Radius Arc to draw out the corrugated shape.


To create a window family, go to New > Family > choose Metric Window
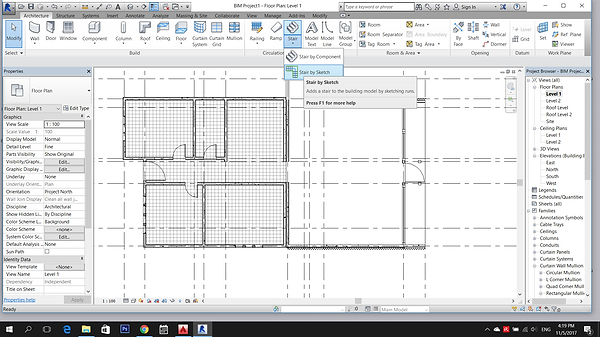

To create Staircase, go to floor plan Level 1 > Architecture > Stair > Stair by Sketch > Riser > use Line to draw out the riser and landing > select Boundary and draw the outline of the stair > click the tick
Offset the line to create a thickness to the shape.
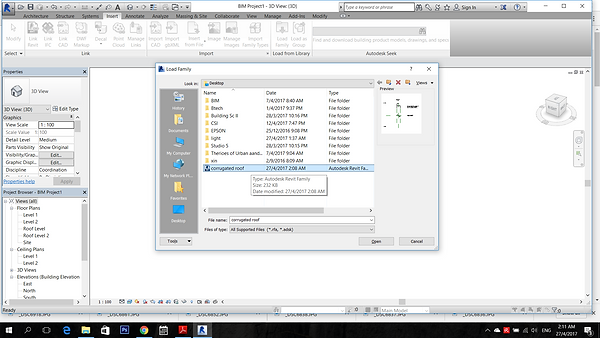
Once the corrugated roof shape is drawn, save it with the file named-corrugated roof.
Go to Insert > Load Family and select the family file that just created - corrugated roof
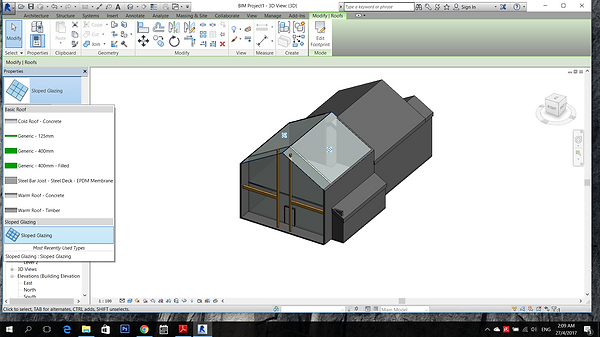
Close the family file. Duplicate a roof > to change the material of the copied roof type, click the roof > Properties > choose Sloped Gazing
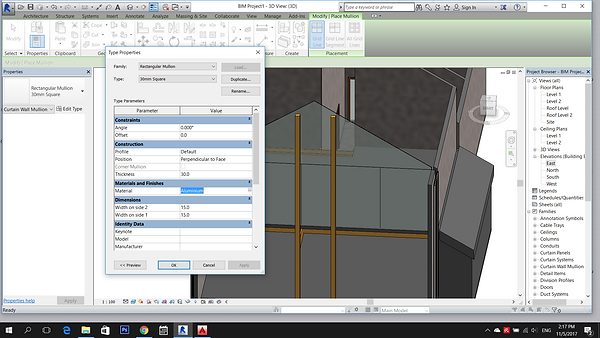
Mullion tool is used to create corrugated roof. Go to Architecture > Mullion > Properties > Edit Type > Duplicate > create a new mullion type - corrugated roof
Go to Construction > Profile > choose corrugated roof > click OK
Select the roof > Properties > Edit Type > set the Grid 1 - Layout into Fixed Distance > set spacing into 160 > set the Grid 1 Mullion - Interior Type into Rectangular Mullion : corrugated roof > click OK
Now, the corrugated roof is done. Attached the corrugated roof sheet to the roof.
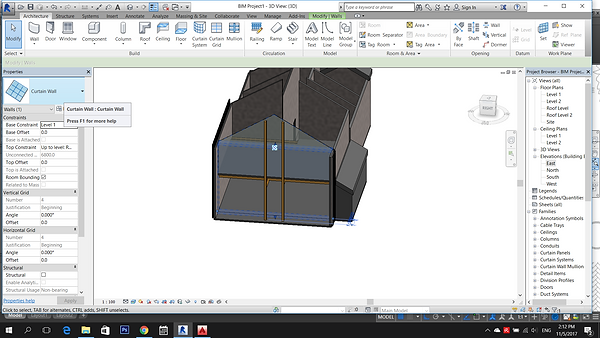
To create a curtain wall, select the wall > Properties > select Curtain Wall
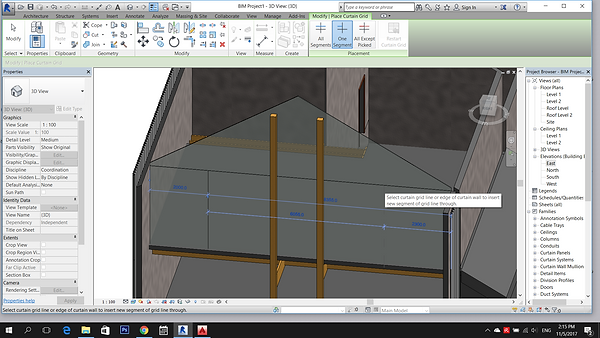
Select the curtain wall > Architecture > Curtain Grid and draw the grid.
Go to Architecture > Mullion > click the curtain grid
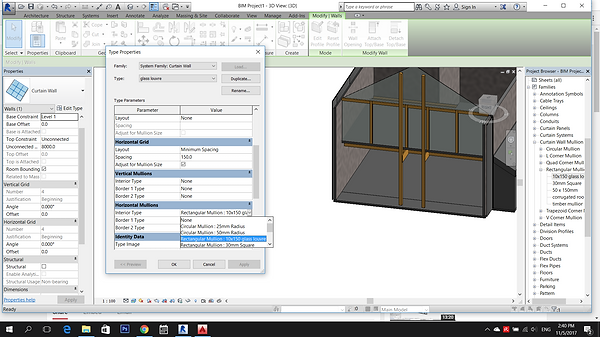
To change the properties of the mullion, select the mullion > Edit Type > Duplicate and create a new mullion type > change the material into Timber and change the width into 150
Select the curtain wall > Right click the 'Glass Louver' > Type Properties > change the Angle to 30 degree > Thickness to 300 > Material to Glass > Width on both side to 5 > click OK
Click 'TAB' and select the part of curtain wall that need to change to glass louver.
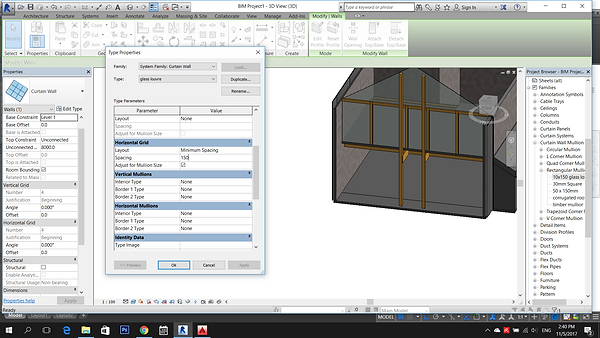
Go to Properties > Edit Type > Duplicate to create a new type - glass louver
Go to Horizontal Grid and change the Layout to Minimum Spacing > Spacing to 150 > Horizontal Mullions - Interior Type to Rectangular Mullion Glass Louver > click OK
Louver window is created.
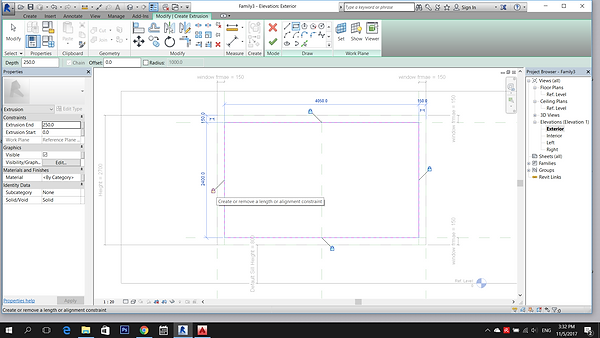
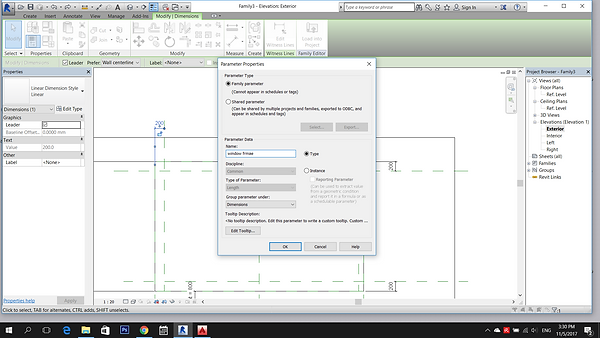
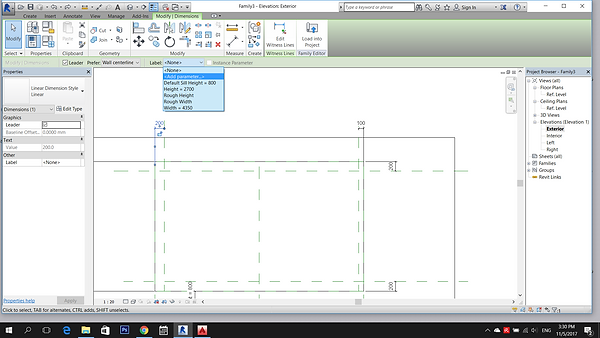
To create window frame, draw Reference Plane for the framework of the window > label the dimension by using shortcut key 'DI'
Select the dimensions > Label > Add parameter > Create new parameter-window frame
Select the other 3 dimensions > label as the parameter-window frame
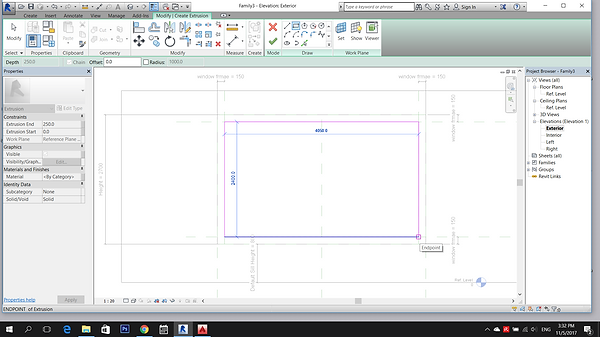
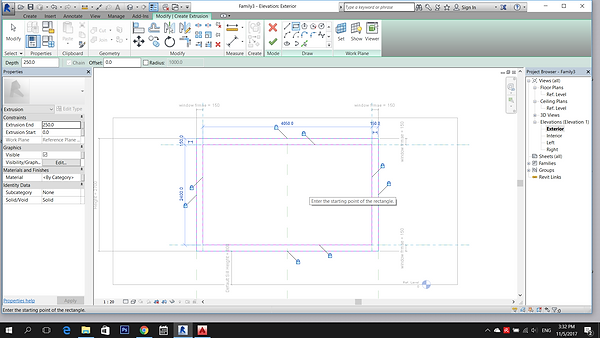
Go to Create > Extrusion > use rectangle draw along the reference plane > lock constraint
To create glass panel of the window, go to Create > Extrusion > use rectangle draw along the reference plane > lock constraint
Go to Elevation view to adjust the thickness of the glass panel.
Select the glass panel > Properties > change the material to Glass
Load the window family into project.

Go to Create > Family Types > Change the height, width and window frame and load out
The staircase is now done.


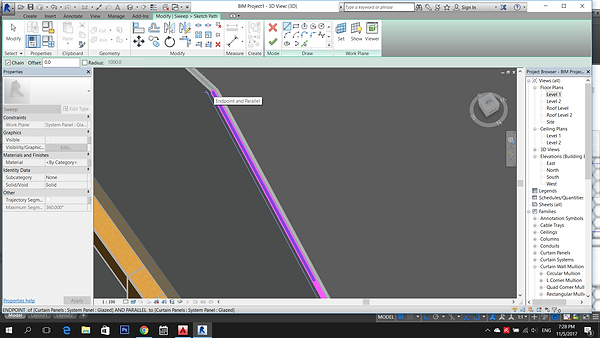
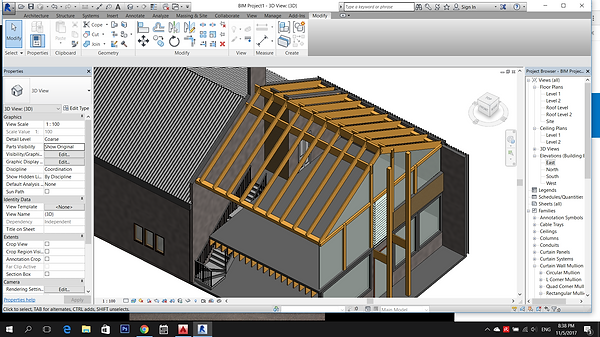


To create rafter, go to Architecture > Component > Model In-Place > select Generic Model > create new name- Rafter
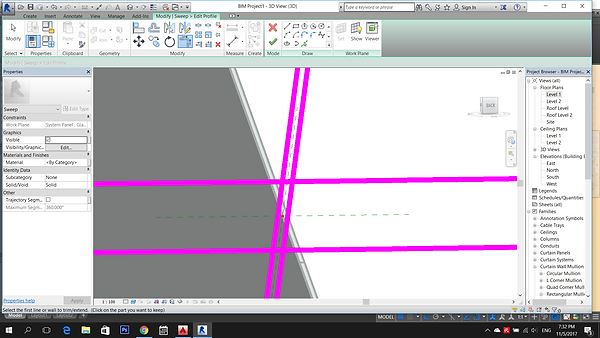
Go to Create > Sweep > Work Plane > Set > Pick a Plane
Select Edit Profile > Draw > Pick Line - select the reference plane and offset the line.
Select Sketch Path and draw a line on the slope > select the tick to finish edit mode
Trim the unwanted line > rectangle shape is created > click the Tick > the rectangle will sweep according to the path on the slope.
To cut the front part of the rafter, go to Create > Void Forms > Void Extrusion > use Line draw out the boundary of the unwanted part >select the Tick > adjust the thickness so that the unwanted part can be fully cut > select the Tick to finish the model
The unwanted part is now being cut.
Use Mirror and Array to finish up the whole rafter.
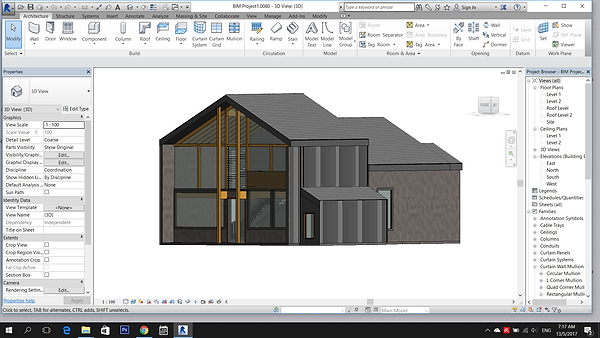

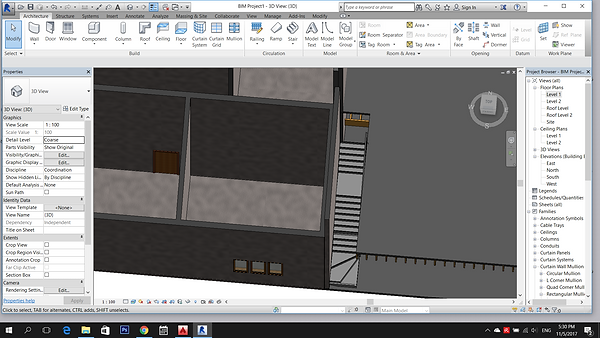
Final Model